Caz does it, OceansDream did it, many others did it, and so did I - we made pixelated icons for the newest generation of RPG Maker engines (as of today).
And as it always goes with fanmade styles, they might have a lot of things, but they might lack that exact one icon you need.
Note: This tutorial is optimized for my own style, as that is the one I know best. You might need to adjust some of the things for other styles.
Step 1: Get yourself a reference
No matter what you make, you usually want to display something, and even if that thing does not exactly exist like this in real life, it is always good to have something to help you imagine your end result.
You will also need a color reference from the icons you want to use that icon along with and you can always use some of these icons as style references as well!
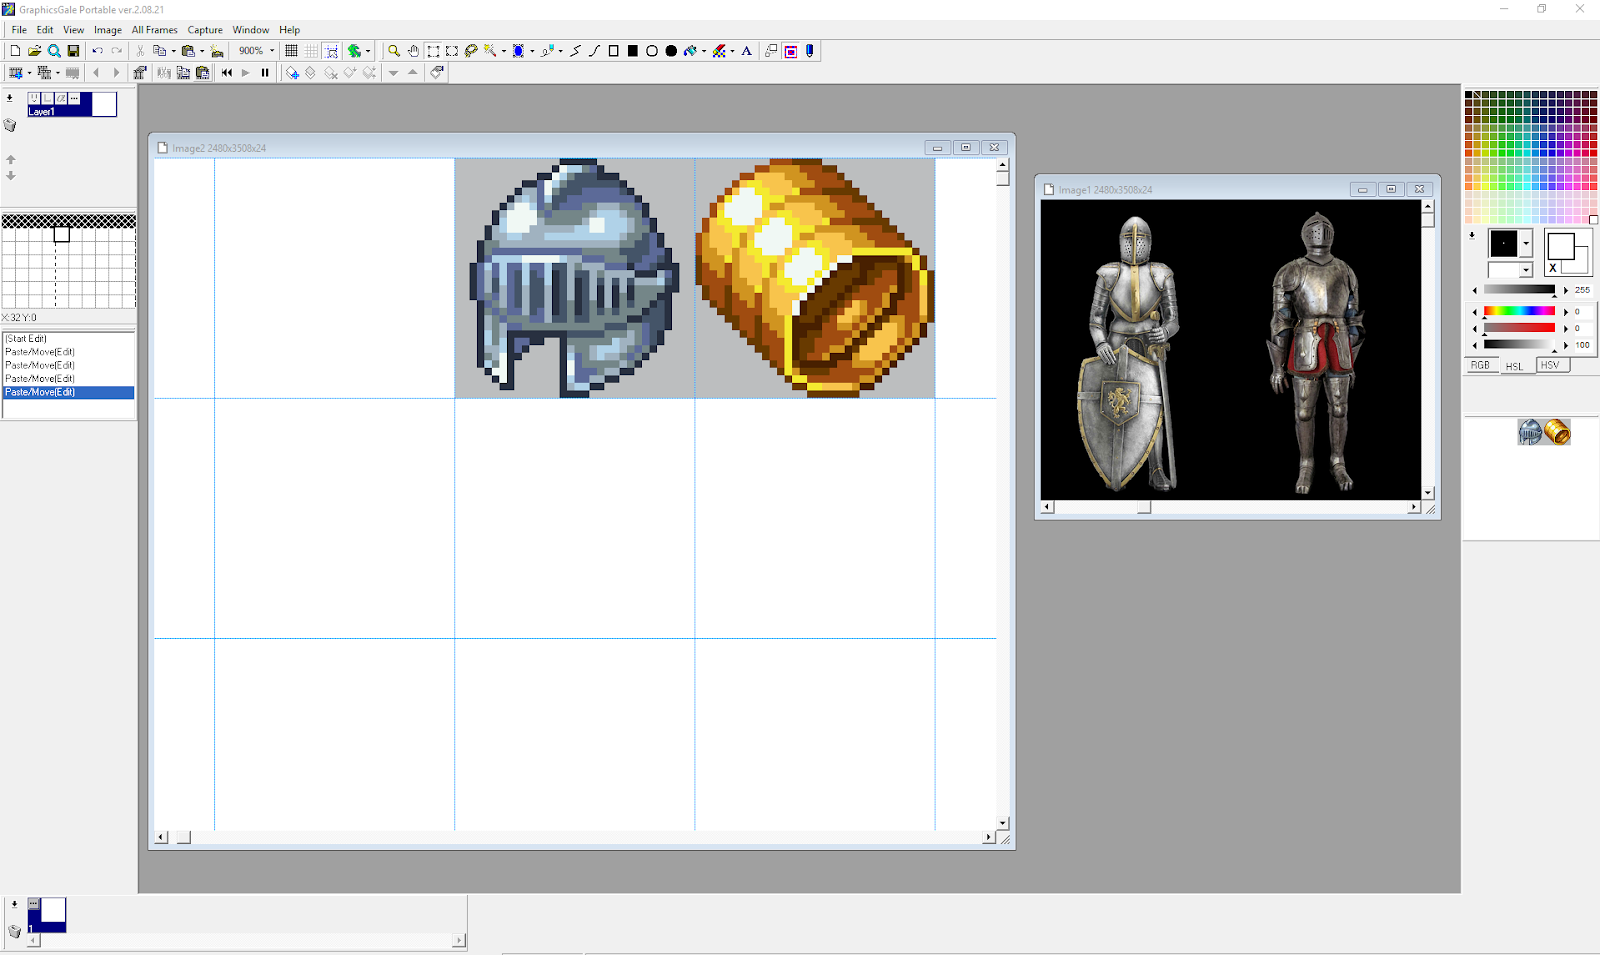
This is how my usual setup looks like. I have my color and style references on the same sheet as the grid I use (for icons, it is 32x32) and my reference for the object, and since we are here on a company blog, my reference is a public domain image so noone gets in trouble ;3
I thought we could start with a helmet, as that one has a simple shape, a not so easy shading and some nice details.
Step 2: The shape
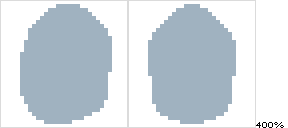
What might look like two pretty random blobs to you is already a decision that you usually make at the beginning of your piece: which angle do you want your object to have? Which dimensions? You usually want your icon to fill up the square as well as possible without looking weirdly square-ish.
Especially for things like helmets/shields/armors you have the option to draw the item in a ¾ angle, which allows you to display some of the side as well and makes for a more interesting angle (left), or to just go in all front (or sideview for some items), which is easier to make and easier to implement all the details, but a little more boring to look at (right).
You can pick either, some work better for different designs and mixing different angles can make your inventory look more interesting, especially if the items look pretty similar.
Step 3: The sketch
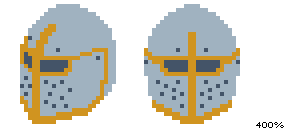
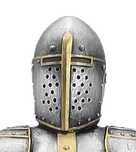
Now use your palette to sketch in the details.
In this step you have to decide what is doable and what not - in my case, the important details (for me!) were the golden highlights, and of course the functional things as the eyeholes and the holes for breathing. The pins were too much here in my opinion, as they would make the breathing area a lot smaller, but I included those above the eyes.
Step 4: Outlines
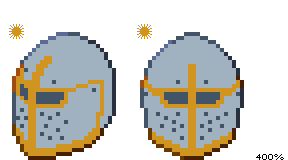
Now imagine, there was a little sun in the upper left corner. Now draw the outline around your object while following this:
-Use the color matching the part the outline belongs to (gold for gold, grey for grey…)
-The upper left corner is the brightest, the lower left corner is the darkest area
Besides that, this is a pretty straightforward process, though you might move a few pixels of your previous work for best results.
Step 5: Shading
This is probably the most complicated part for most people, but let me take your hand and walk you step by step through it.
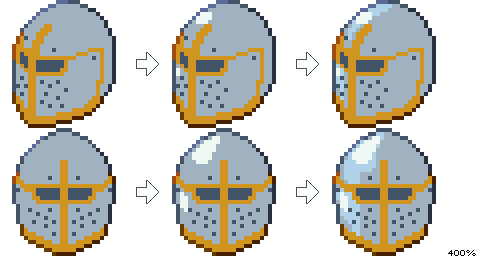
You start with either highlights or shadows first, here I used the highlights.
The light comes from the upper left, so what happens when light hits that shape of that material? Well, for Metal, I get a kinda round shadow on the “curved” part and a smaller light strip on the side - so I drew that in in my lightest color.
Then take the color that is between highlight and base color to refine the highlight, so you get a smoother transition and the shape of the object becomes more visible.
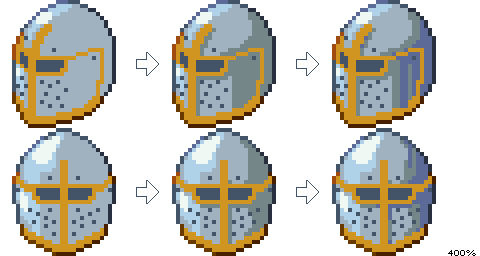
Of course you can also do it the other way around, as I showed here with the shadows.
With the medium shadow color you draw in the shadows and ensure everything that is not flat (as the golden ornaments) cast a shadow. Then you go in with a darker color and follow the shape of the objects and add the darkest area. As we have a metal part here, I added in some stripey reflections.
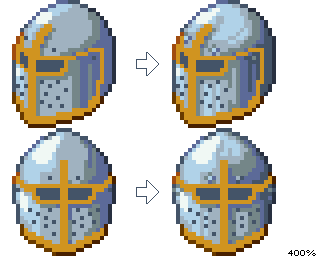
Now it is time to add darker shadows and refine.
Look at your icon. Are you happy with how the part you just shaded is looking like in total? Is there something you want to change? You can also use this step to add some of the details in that area (here the pins/screws) and the darkest shadows.
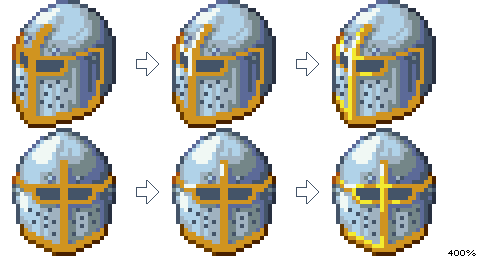
Since the steel part is now shaded for now, lets turn to the next area. And here you do the same: add in the highlights shade by shade following the shape of the object and making sure the light comes from the upper left.
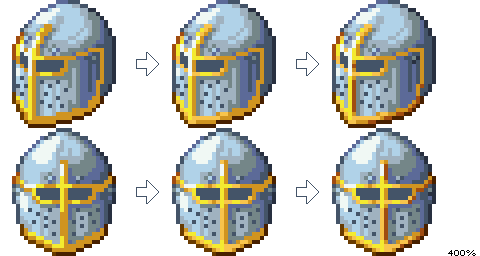
The same goes for the darker parts.
If you have more separate areas in your icon, repeat these steps, until you have them all shaded this way.
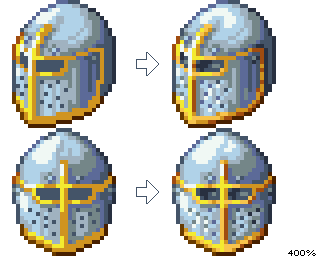
Again, I saved the darkest shadows, to add them with the final refinement process.
Is there any area you might want to adjust now that you shaded all different parts? Are there any tiny details that could use some extra attention?
In my case, the shading could use some adjustments and the eye- und breathing holes felt kinda… flat.
Of course there is light that goes through these holes, and so they can be shaded as well. Adding highlights below and on the right side of the breathing holes also makes them look more like there is an actual hole and not just a dark spot on the helmet.

And there you go! This is how you get a pixelated helmet icon for RMMV/RMMZ!
本贴来自国际rpgmaker官方论坛作者:Avery处,因国际论坛即将永久关站,为了存档多年珍贵资料,署名转载到本论坛存档,由于官方帖子为英文原帖,需要中文翻译请点击论坛顶部切换语言为中文就可以将帖子翻译成中文浏览,方便大家随时查看,原文地址:
https://forums.rpgmakerweb.com/threads/making-a-pixelated-icon-for-mv-mz.156430/ 简体中文
简体中文
 English(英语)
 日本語(日语)
 Deutsch(德语)
 Русский язык(俄语)
 بالعربية(阿拉伯语)
 Türkçe(土耳其语)
 Português(葡萄牙语)
 ภาษาไทย(泰国语)
 한어(朝鲜语/韩语)
 Français(法语)

 聊天机器人
聊天机器人




 窥视卡
窥视卡 雷达卡
雷达卡



 发表于 2026-7-7 19:54:22
 提升卡
提升卡 置顶卡
置顶卡 沉默卡
沉默卡 喧嚣卡
喧嚣卡 变色卡
变色卡 千斤顶
千斤顶 照妖镜
照妖镜