
I live in Europe, so every now and then I visit villages which are quite old and try to preserve their atmosphere. One thing that I notice a lot, that while there is a lot of variation in the houses we can see there in terms of shape and design, the range of materials is rather limited. And of course, that makes sense. Without trucks it is very expensive to move building material, so it would make sense that most people will settle for the best option in range. If they live in an area with lots of slate, guess what their roofs are covered with. Exceptions might be cheaper and even more accessible materials like straw, so maybe the poor people use that for their huts or it might be used on stables.
What I mean is that if we look at a map like this…
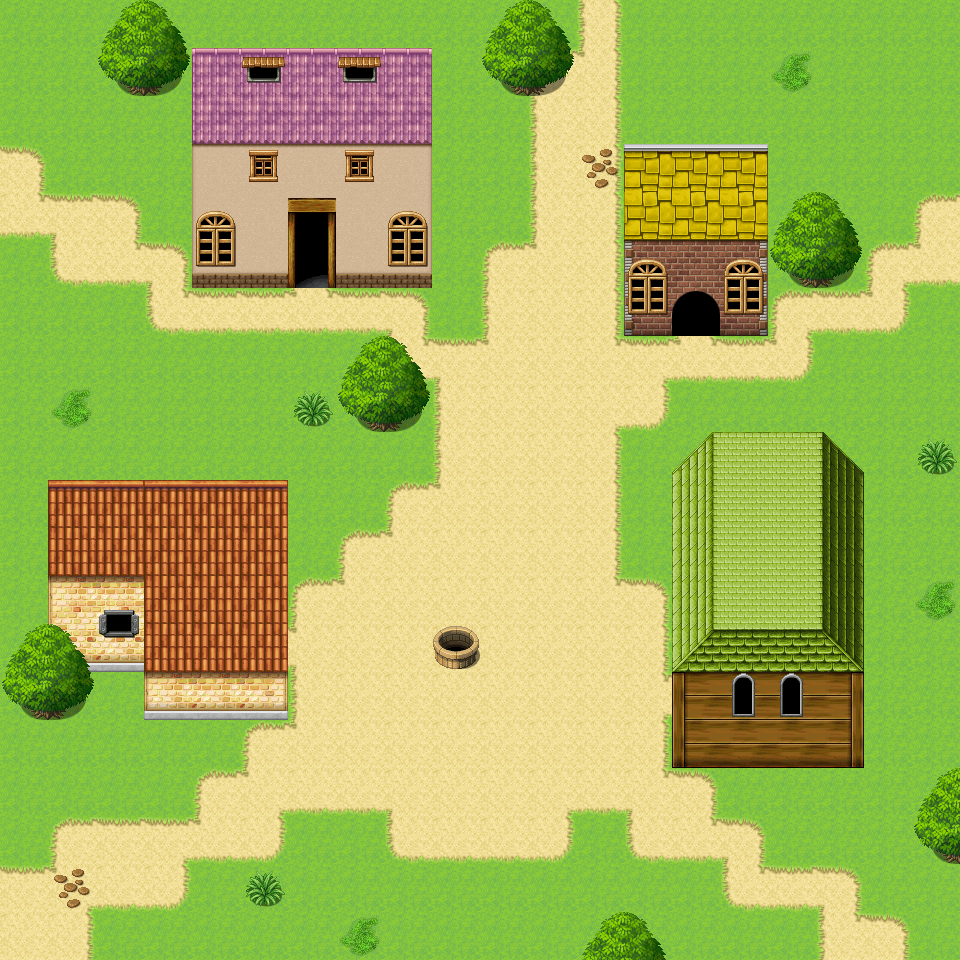
…we might wonder: how the hell can the people afford to get all those different materials delivered? One might argue that there are similar bricks used in two of the houses and that wood might be the pick for the person who could not afford it, but 4 different roofs already are a little suspicious, especially with different materials.
But on the other hand…
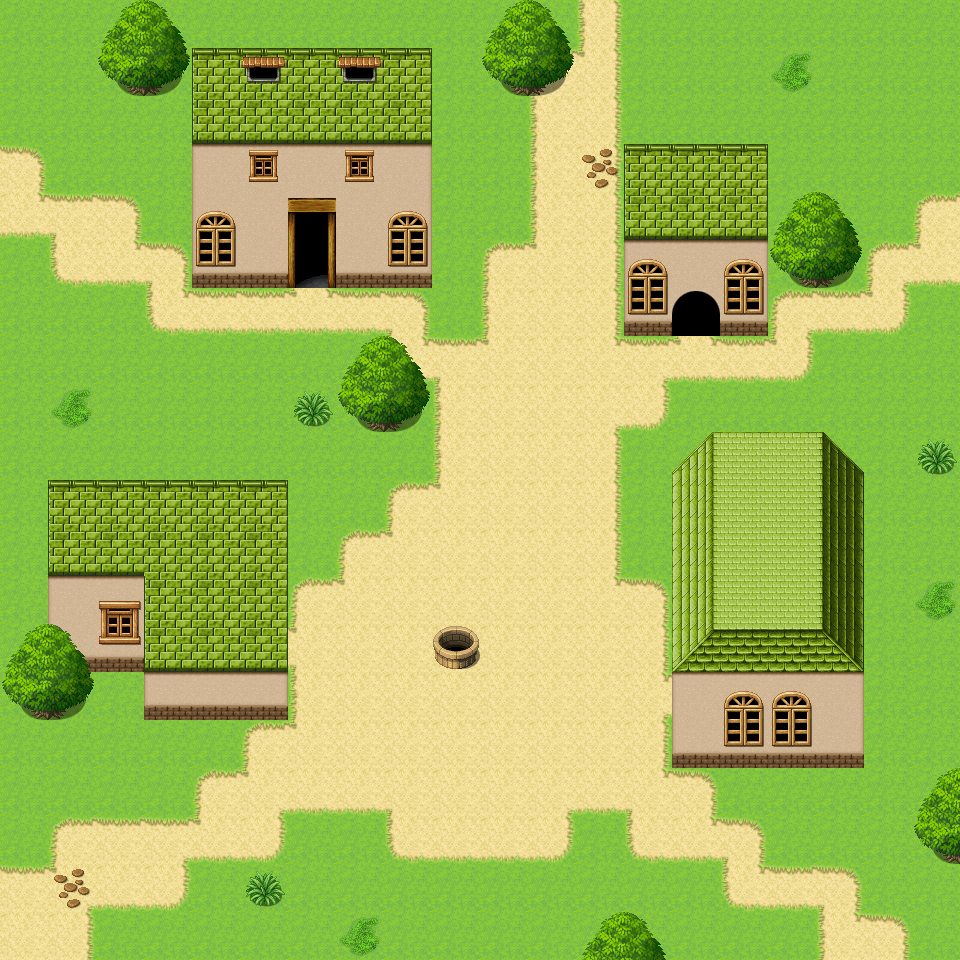
…even with the different windows, if we use the same texture all over, it might become a little too boring, even if we think about adding more roof variations, balconies, custom stairs and so on. I will not go over how to make those, as there are also dedicated tutorials for those:
Roof Variations Part 1Part 2
Balconies
Stairs
To make one nice consistent medieval Fantasy village with interesting buildings, we can make the following steps:
A3
This sheet is the backbone of everything we will see on this map, as the roofs are the base for further edits and the “to go” option for simply shaped buildings.
But if we look at the default A3 set…
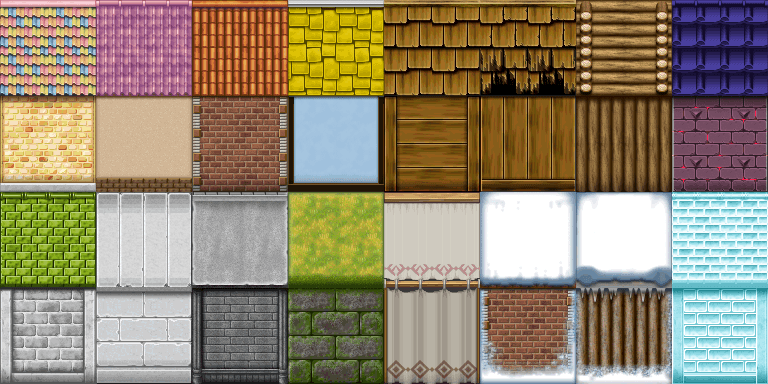
… in fact, we have a lot of stuff, our normal village does not need at all.
Even if we do not care about the wild mix of materials…
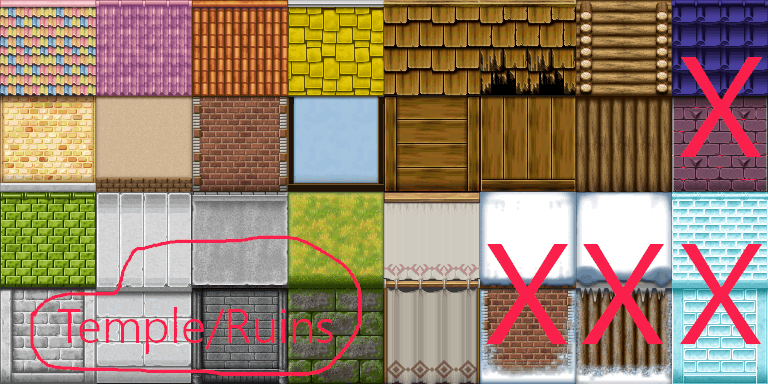
the 4 tiles with an X would under no circumstance be mixed with the other ones in a normal village environment. For the tile on the left on the lower row I am not sure, but the 3 next to it would rather fit a church, temple, ruin… which might exist in your village, but does not have to do so for sure. Same goes for the curtain. Which I did not mark here. It could be used, but it depends on the location and design of your village.
What I want to say here: most of those would not be used in your village anyways, and if you settle for a more consistent material design, you are left with even less slots, which means, you have a lot of room for variations.
Now if we go for a default medium climate village, here is something I would recommend:
- Pick a limited set of base materials
Don’t restrict yourself to Outside_A3 here, as the A4 walls work the same as the A3 ones and don’t forget that shingles are often timeless. Here is a combination of default roofs and walls from various sheets that I picked:
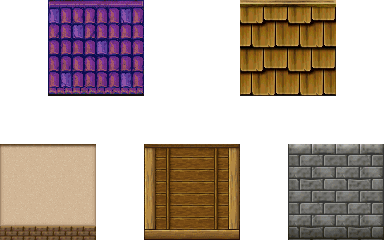
I like to have one more expensive and one rather cheap roof, here shingles and wood.
Also I picked one type of stones, a good wood base and some plaster.
If we now just try out our tiles, we see some issues:
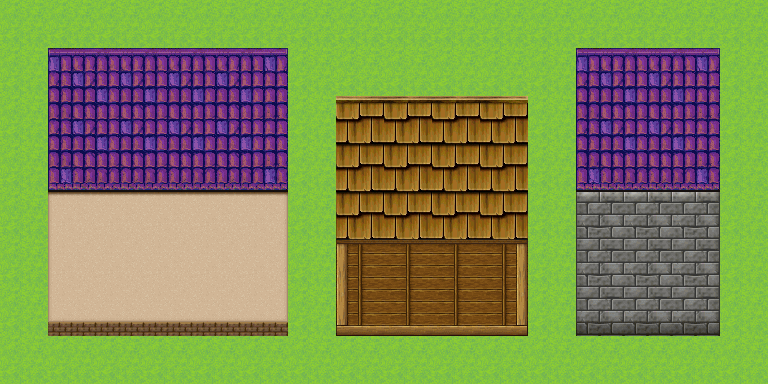
- The stones at the bottom of the plaster tile are not the stones we picked as our base
- The wood and stones came from an A4 and miss the shadow the roof would cast
- Bonus: I would rather have the shingles be bluish slate
So we start with something like this:
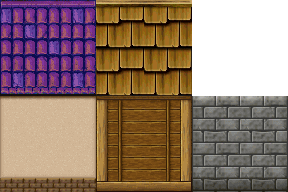
And with some copy and paste we get rid of several of these things already:
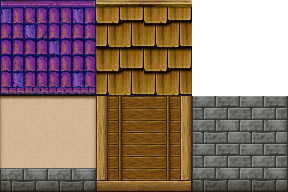
Now all that is left is some recolor and shadow, the shadow is made by box selecting the top few rows and making them darker, and then selecting an even thinner piece on the top and making that darker as well, to get some kind of gradient.
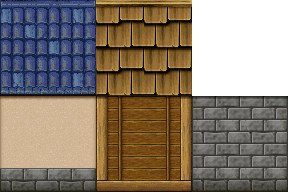
You might also notice that I slightly recolored the wooden roof to better go with the sides.
The wooden walls often have kind of a frame, one that usually goes very well with both the default “wood background” and plaster:
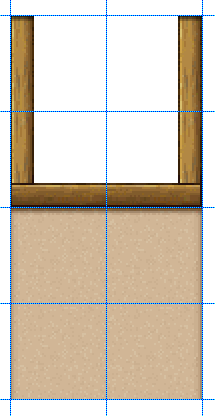
And in fact we can get some nice additional tiles if we just use that frame and make some quick edits, as here:
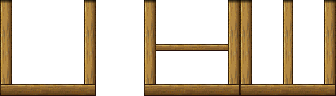
Which, again, with simple copy and paste can lead to variations as those:
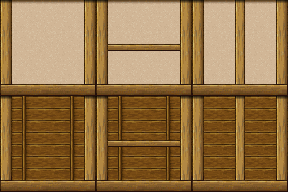
These are still missing a shadow, remember that the light comes from the upper left, and therefore the beams cast a shadow on the bottom and the left.
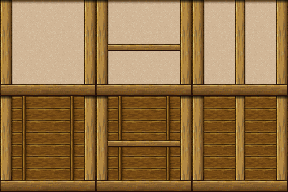
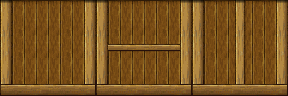
Remember that you can rotate the wood texture as well:
Another mix and match edit happens to out plaster with stone bottom:
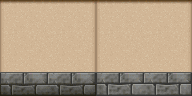
On the left is the one that i placed on the grund, but if we replace the lower row with some “normal” stone row from the middle of the stone wall, we can make combinations like this:
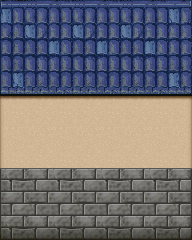
Another possibility is to add some “stone edges” to the plaster tile:
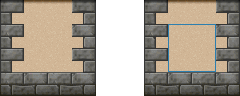
Just remember that those may only affect the outer 24px wide frame and that the middle tiling 48x48 square has no stone on it.
The roofs on the other hand can not so well be mixed, but we can edit them to have some variation, too!
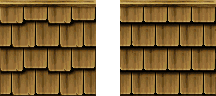
We started with the left one, so we can make a more “new” and in line variation of it by evening out the shingles and removing the cracks. If we started with the right one, the left would be a neat variation for a more worn down roof!
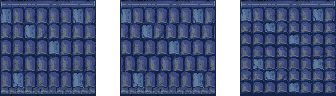
For the slate shingles, we can simply experiment a little with placement and size, as long as they still tile (which leads to the shingle length and width having to be divisors of 48), we can get some nice working patterns!
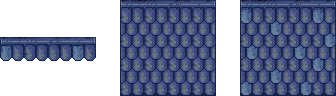
You can also experiment with shape variations, as long as you are able to get them into a tileable forn. For example by rounding off the bottom line of the tiles and arranging them, we can get a very different pattern out of the same material. By adding some slightly off colored tiles we can make that tile already much more interesting.
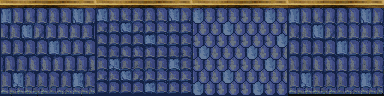
You can give them even further variations by adding a wooden beam instead of the shingle one to the top.
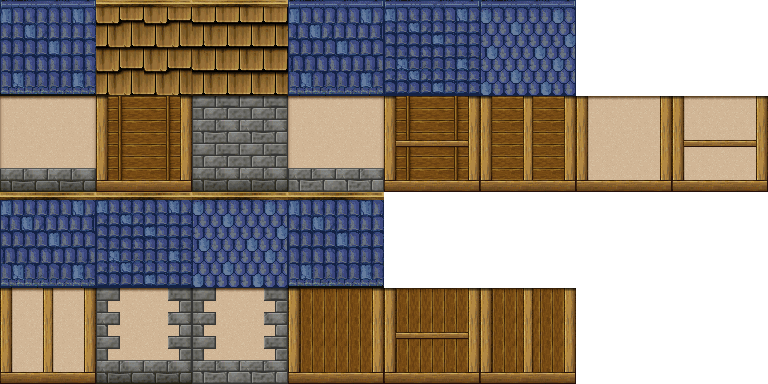
With all these variations, we already have a lot to pull from:
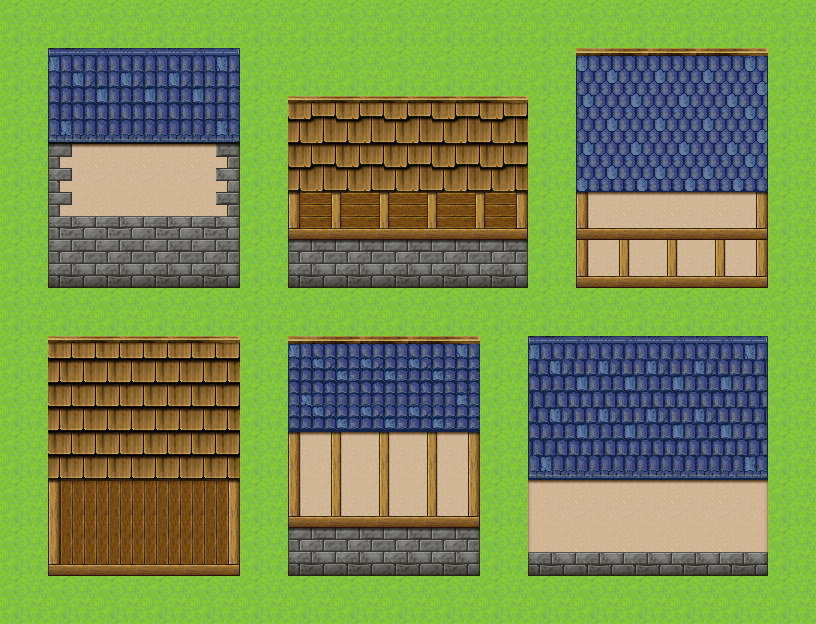
And here are just a few of the combinations you can make with them:
For one last edit, you might have seen houses, where the second floor is somewhat protuberant. We can simulate that by making some of our designated “ground floor” tiles more narrow than they need to be - something you will very likely want to do to the stone, but that you might also want to do to other of the walls:
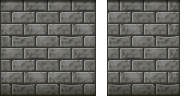
Left is the default, right is the more narrow version.
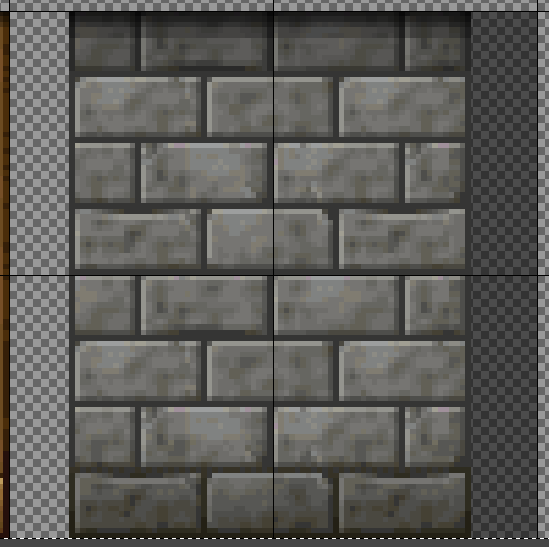
This tile should also get a more prominent shadow to the top, as the upper floor would cast that, and if you use autoshadows, a 50% black shadow on the left side.
Here are two examples you can make with those:
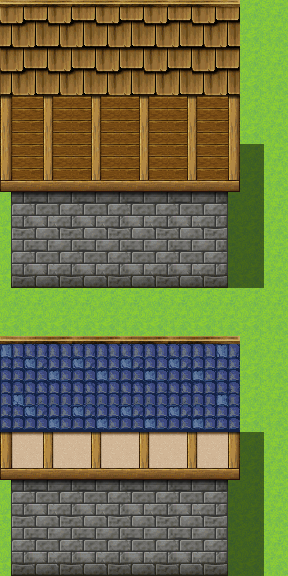
Tip: If you have too many walls to fit them on A3, you can also place them on A4 in a wall slot, you probably won’t need that full sheet as well.
B/C/D/E
This will eat up a lot of space, but you very likely want to make some additional placements for the windows:
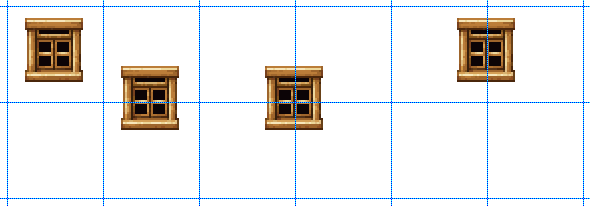
This tiny wooden window usually is placed on the middle of one tile, but you could also place it so it is in the middle of a 2 tile high wall and that it is in the middle of a 2 tile wide wall - and both. This will allow a lot of different ways to map things!
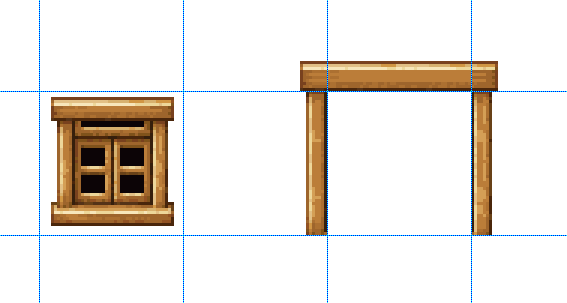
You also might want to use the windows as a base for a door frame! Make sure it fits the door size yo use, here I went with the default 1 tile size!
For another neat addition, we map 3x3 squares of every roof we have:
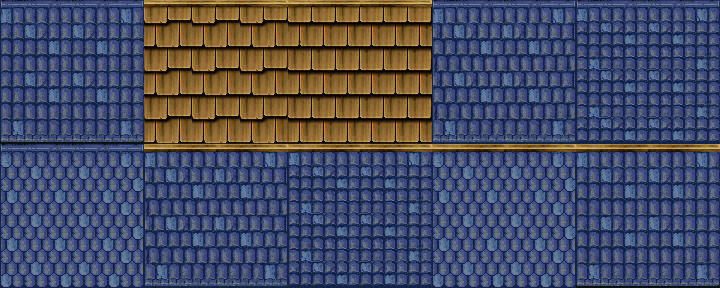
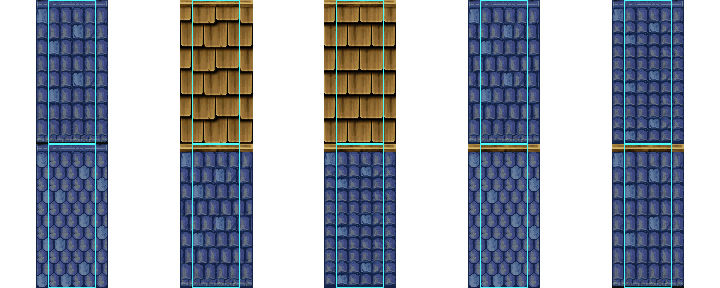
Then we edit them to be very narrow by cutting and copy and paste, with the middle tile unaffected and more as a guide so the sides match it perfectly.We just want some slim pieces of each roof that make it a little wider than the default tile.
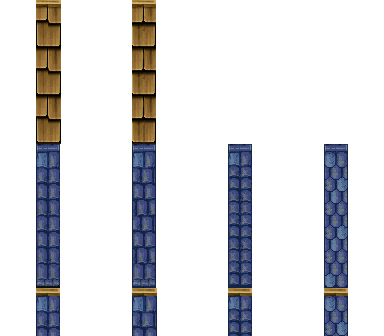
Those are all the tiles we actually want for our B/C/D/E sheet, and for the shingle roof with the wooden beam we just need the top, as the rest is identical with the other ones.
Here you can see all our new edits:
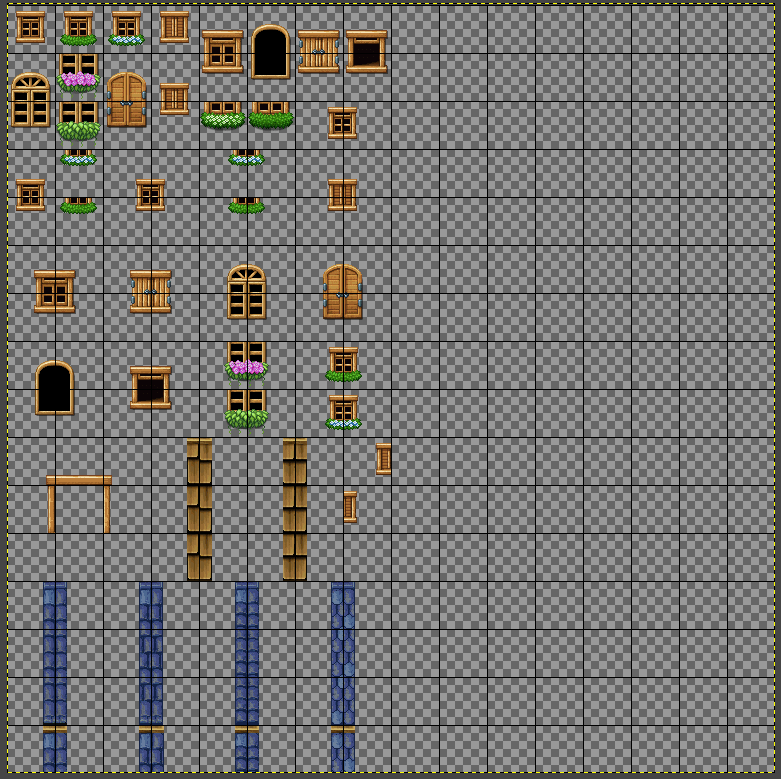
And now to the result:
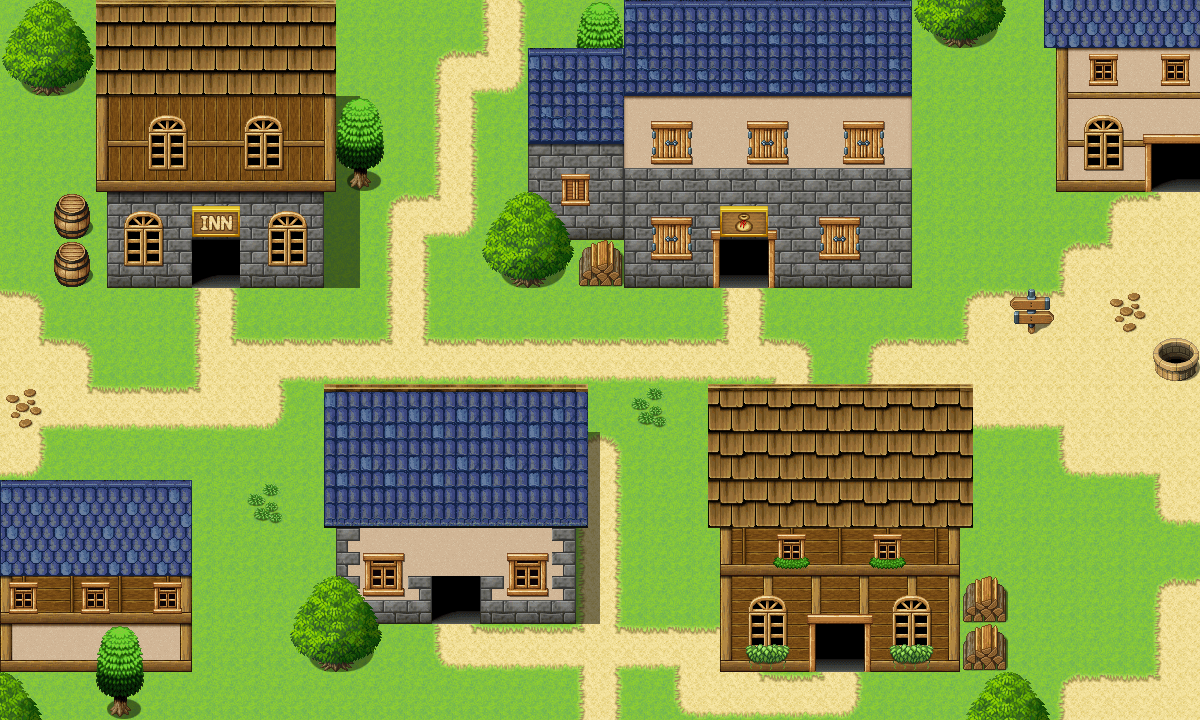
We can even get more variation by doing some of the edits linked above and by making some variation to the window shapes or adding some recolors for the plaster for example, but this already gives us an enormous amount of options to work with!
If you give each region their own pool of wood, plaster and stone, your players can easily identify where in your world they are.
本贴来自国际rpgmaker官方论坛作者:Avery处,因国际论坛即将永久关站,为了存档多年珍贵资料,署名转载到本论坛存档,由于官方帖子为英文原帖,需要中文翻译请点击论坛顶部切换语言为中文就可以将帖子翻译成中文浏览,方便大家随时查看,原文地址:
https://forums.rpgmakerweb.com/threads/one-town-one-style.156096/ 简体中文
简体中文
 English(英语)
 日本語(日语)
 Deutsch(德语)
 Русский язык(俄语)
 بالعربية(阿拉伯语)
 Türkçe(土耳其语)
 Português(葡萄牙语)
 ภาษาไทย(泰国语)
 한어(朝鲜语/韩语)
 Français(法语)

 聊天机器人
聊天机器人




 窥视卡
窥视卡 雷达卡
雷达卡



 发表于 2026-7-7 19:35:06
 提升卡
提升卡 置顶卡
置顶卡 沉默卡
沉默卡 喧嚣卡
喧嚣卡 变色卡
变色卡 千斤顶
千斤顶 照妖镜
照妖镜