Parallaxes are a great thing, and people like me spent too many hours just joyfully mapping mountain cliffs (with nice waterfalls) and a great view by utilizing them.
But what if the great view doesn’t loop?
What does a picture have to bring to be “loopable”?
And how do I make it loop?
First, the most important question: is our base actually loopable?
A good example for something we can get to loop horizontally is the wasteland Titlescreen (all shown examples come from RMMZ):
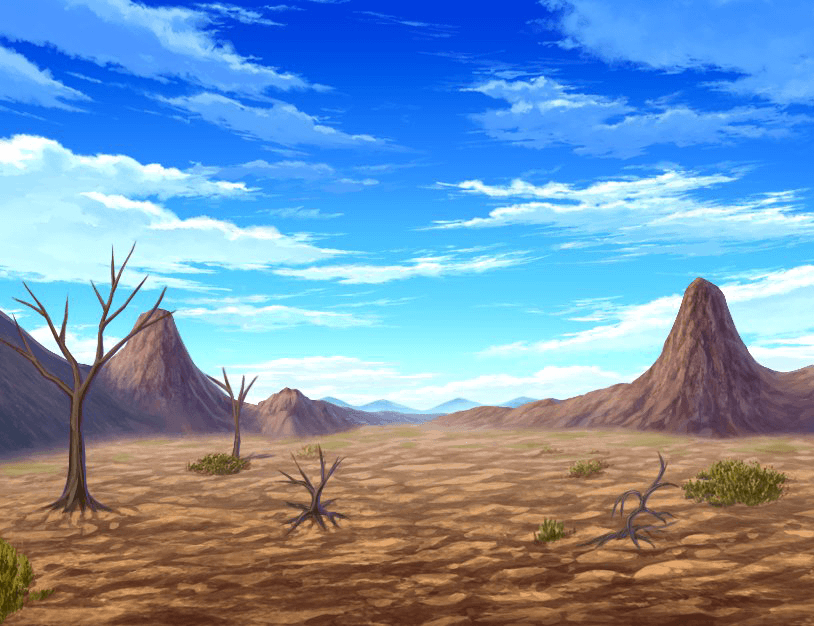
That is so for several reasons:
- while there is some perspective involved, we don’t have one clear vanishing point, for a looping background that might look odd, when the background moves and you suddenly have your objects belonging to two different vanishing points visible
- there is nothing giant and distracting, imagine walking over a huge mountain and experience the same building fly past multiple times in the distance
- the left and right sides are not too far off from each other, they share the same components at nearly the same heights. This is crucial when you need to make them work!
- a controllable light situation: soft ambient light works best. Imagine you have a repeating sun or you have to stitch a very dark side to a light one or have conflicting shadows…
- since all of those factors are easier to control for an artist than for someone taking a picture, you are usually better off doing this to a drawn background
Here is an example for something that would be something I personally would not (want to) stitch:

- The temple is too unique to have it repeat in the background, unless we have a giant temple area as Angkor Wat
- We don’t have enough tree material to stitch the trees on the side, so heavy redrawing would be needed
- The water line seems to go diagonally and it would be difficult to make it believable with its place and the temple
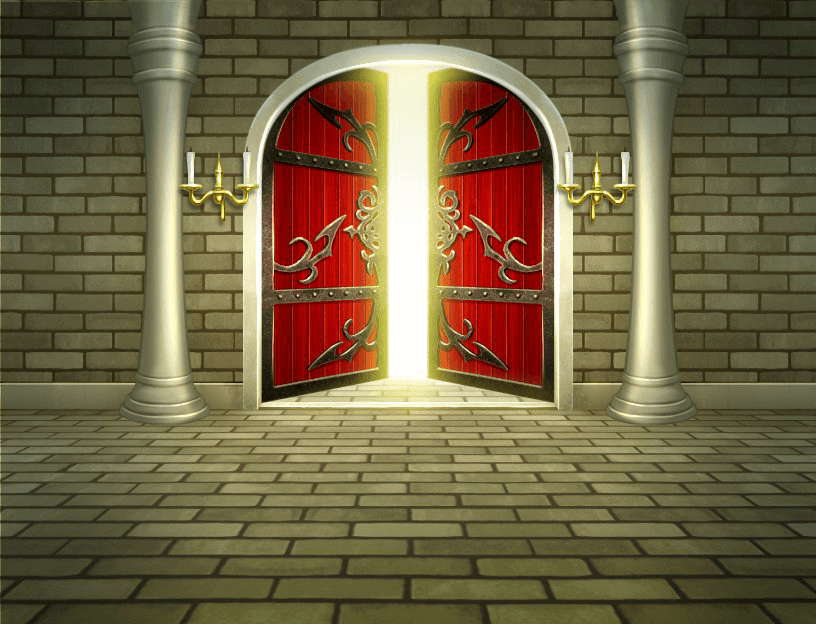
- Here the whole wall and door situation is very doable, but the floor is an issue: it has a clear vanishing point in the center and we cannot make it work unless we create a whole new floor situation. It might be possible, but since it also leads into the light we’d have to reconstruct the lighting situation as well.
Everything what follows was made with Gimp which is free and a mouse.
So, to begin, we simply open our little project in Gimp, and depending on your image format, if you start off with a title screen like we do here, you need to set the image mode to RGB first.
Then we duplicate the layer, as we want to keep the original on hand in case we need it to grab an element from it. On our duplicated layer, we cut the image in half and paste it onto a new layer, swapping the side for both pieces:
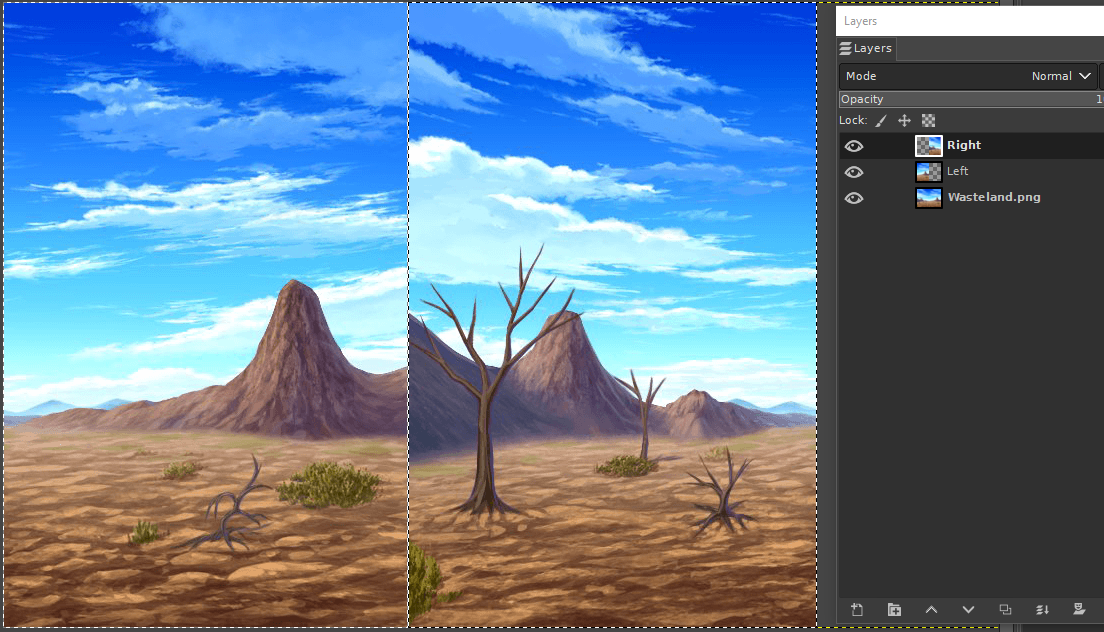
That way, we transformed the problem. Instead of trying to stitch two sides somehow together, we have a looping image with that… well, let’s call it a crack in the middle.
Now we have to use a clever combination of copy and paste, clone stamp, healing, redrawing and everything else that helps to make it one image instead of two.
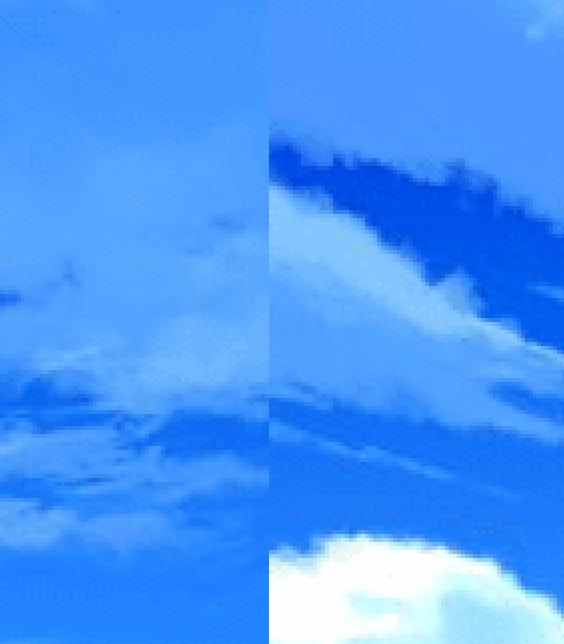
This area in the clouds for example already looks super good already, we just need to fuse those areas into one by closing the outline and erasing the clear crack.
For the outline, copy paste can be an option, as we have this neat bit on a different part of the clouds:
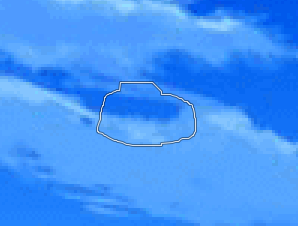
With some rotation and slight recoloring it fits snugly into that gap…
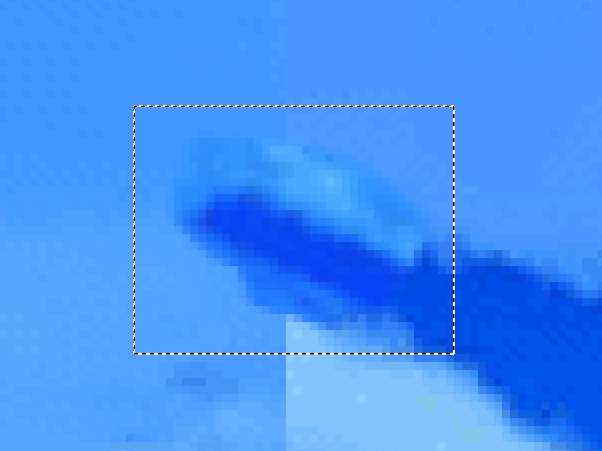
…and then we can just trim off the excess with a soft eraser:
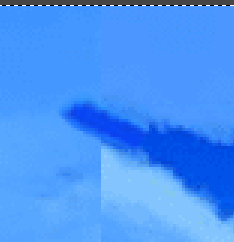
For the rest of the issues in this cloud we can use the healing tool. Healing takes a part of the image as “source” and tried to fix the location you are working on with said source as reference.
For the clouds we place our source on an intact part of the cloud and carefully work over the problematic area:
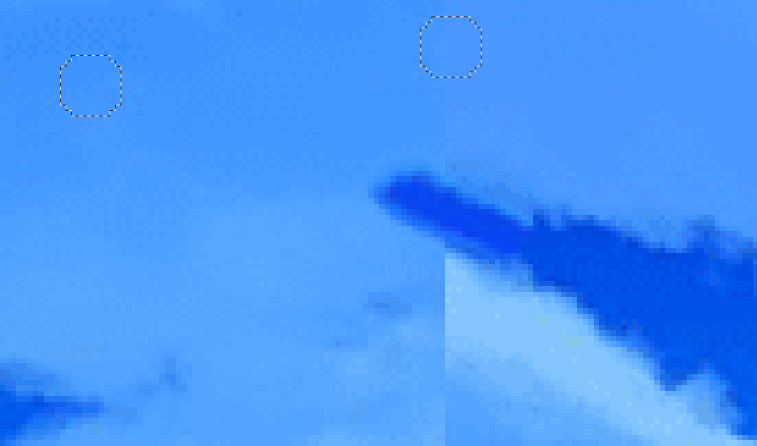
As you can never say if the algorithm does as you wish you will have to try around yourself when it is a valid option. Remember to place your source by holding control and clicking before you can use this tool!
And after we healed the cloud, the image starts coming together:
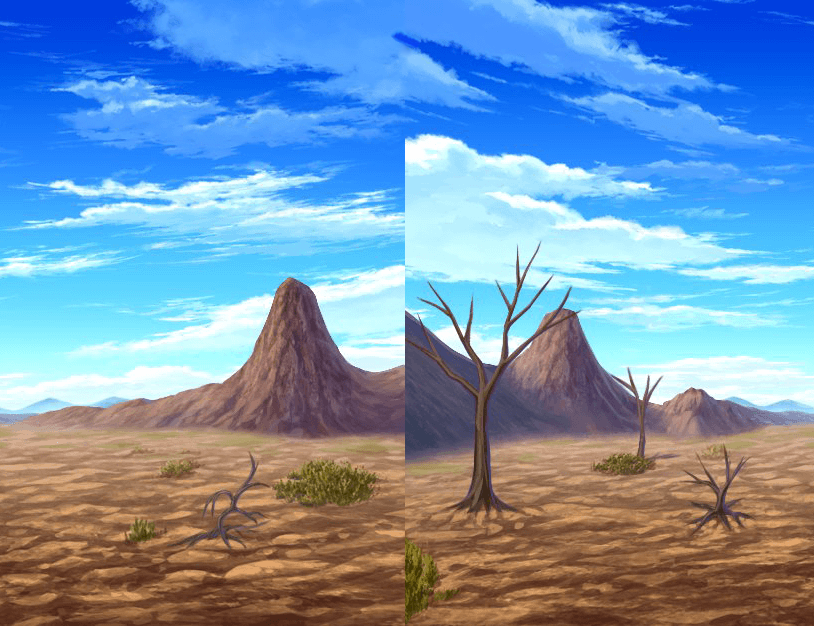
So far we used healing and copy and paste, and those are my two go to tools as far as they carry me and you will be surprised how far they can take us, if used carefully.
Remember we saved the “starting” image on a separate layer?
The middle area has a giant section of nice ground:
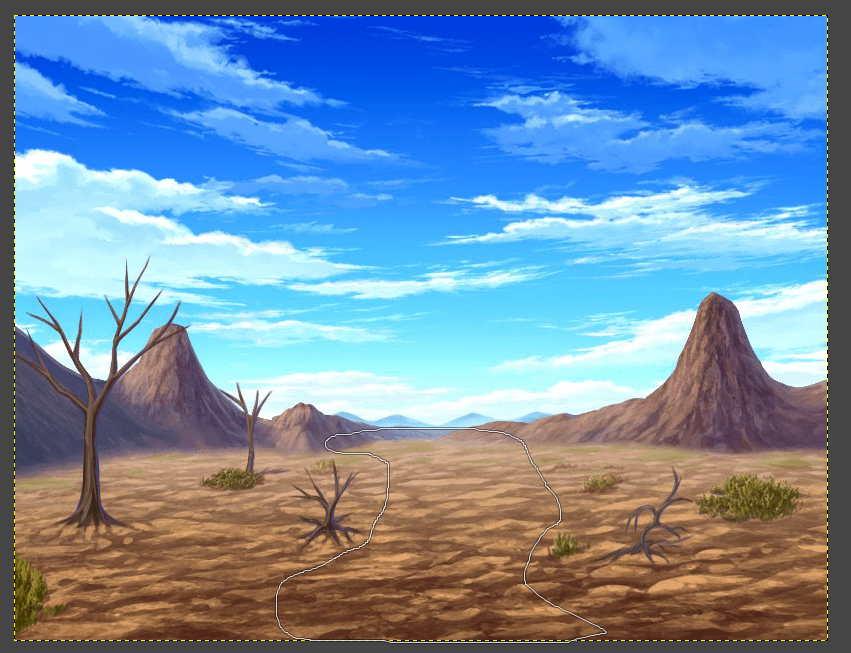
Let us copy it and paste it on top of our work in progress and see how well it fits in:
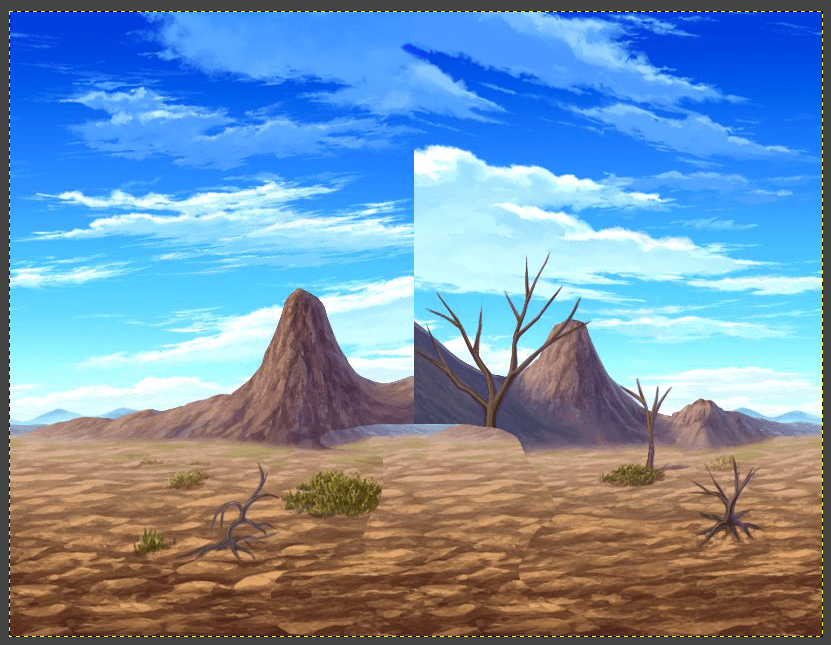
That again already works pretty well, and covers that small bush part that we had in that section before. In fact all we have to do is to either use a layer mask and a soft black brush or a soft eraser to create a smooth transition to that new area. The rule of thumb is: trim away as much as you can while keeping a good looking pattern, that way you have less repetition.
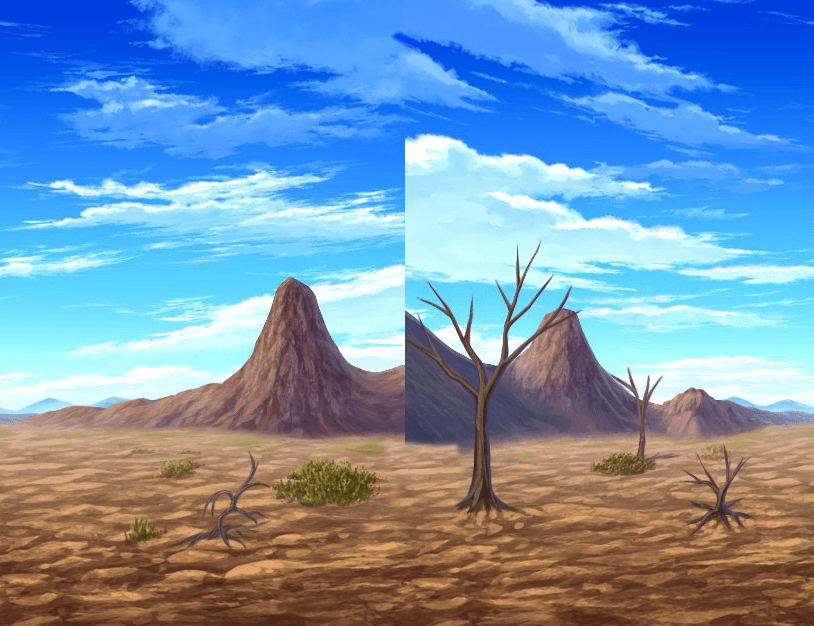
We leave the top area unfinished, as we don’t know yet how the mountains will turn out there, but with this simple edit we closed up another huge part of the image.
Now we enter the “okay, here we need to draw”-area, right?
No!
If you are stuck at a certain part, take a step back and analyze your issue. Can you get rid of the element that is causing trouble? What would you have to draw to solve your problem?
The second question is the one we need to ask in this case, we would need to draw the left side of the hill to somehow connect to that dark right side.
And we have hills. Just at a different angle, but… we can rotate!
That is what we do, we copy our mountainside…
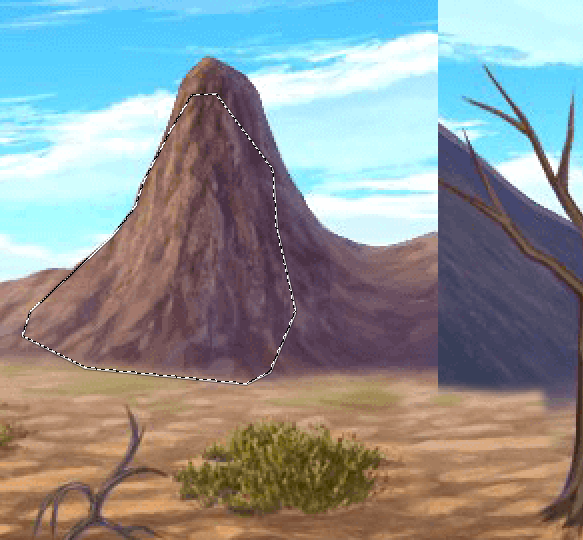
…and paste it in rotated at the angle we need it to be:
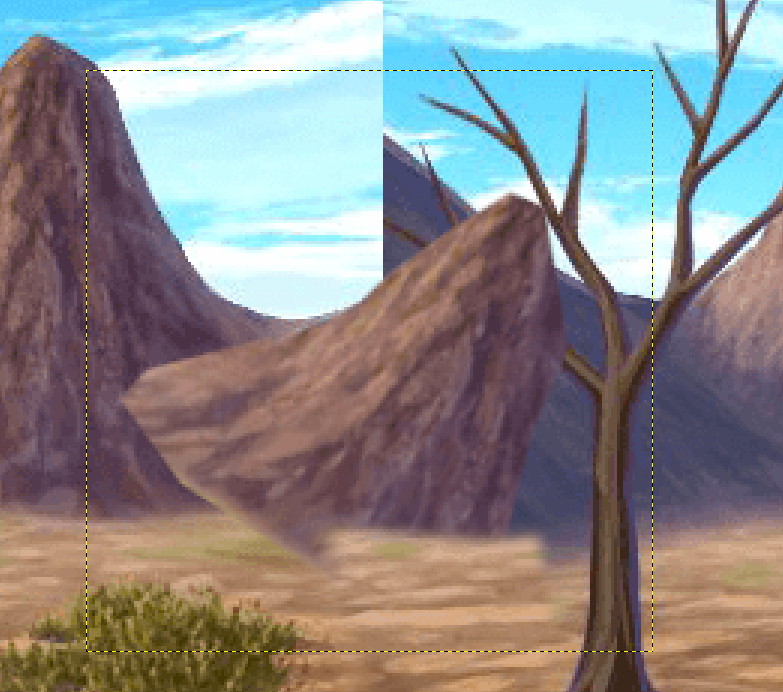
Then, since we now have to do a lot of careful working over that piece, we set the layer’s opacity so something around 50, so we can better see what we need to take away and what has to stay.
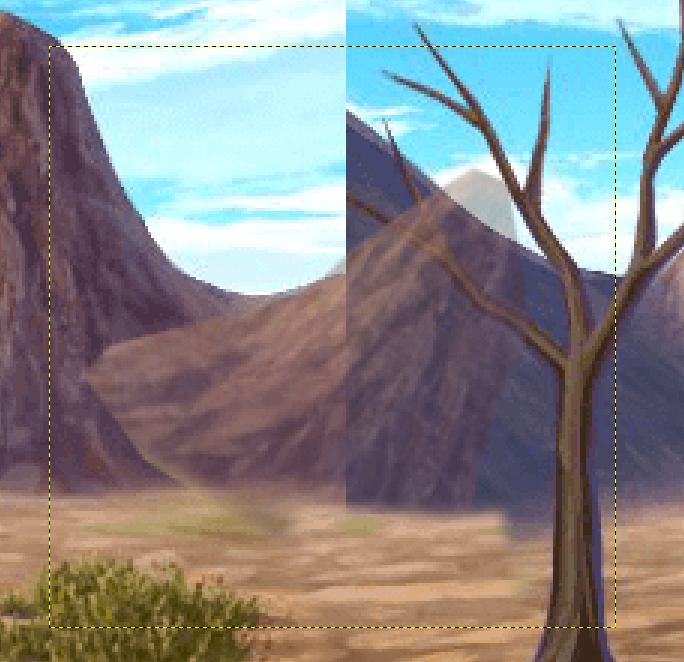
With again a very soft eraser we carefully follow the structure of that mountain piece and “work it into” the surrounding parts:
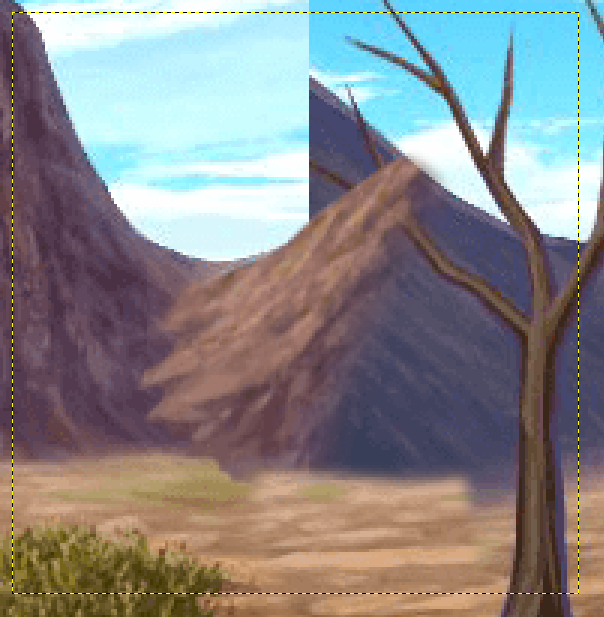
Now we use a layer mask and a black brush to let the branches be on top of it again and since we now know how the mountain looks like, we use the eraser on the ground as well to make everything fit:
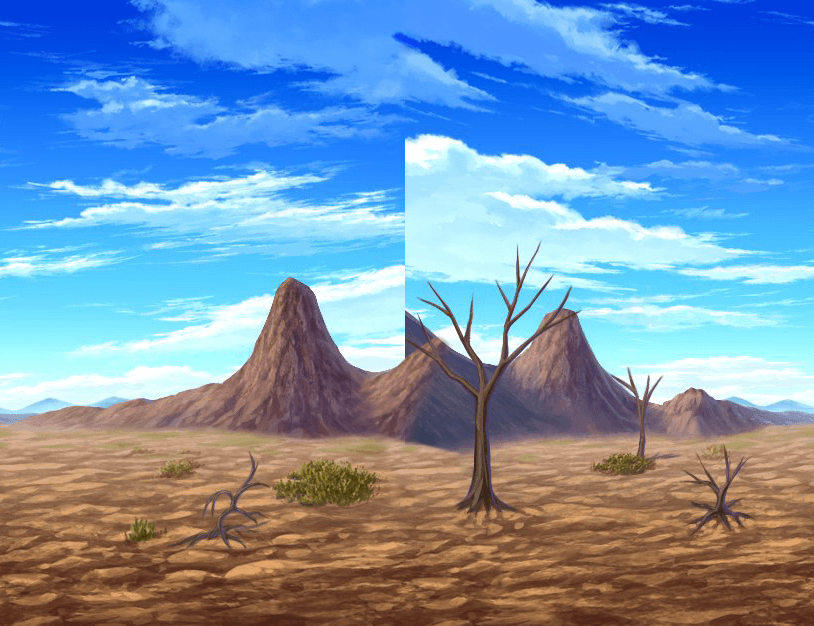
So far all we did was clever copy and paste, erasing and some healing!
And you can bet that we stick to that!
What worked for the ground can help us with the sky as well, so we copy a large piece of intact sky, this time we mirror it so we kinda create symmetrical clouds with it…
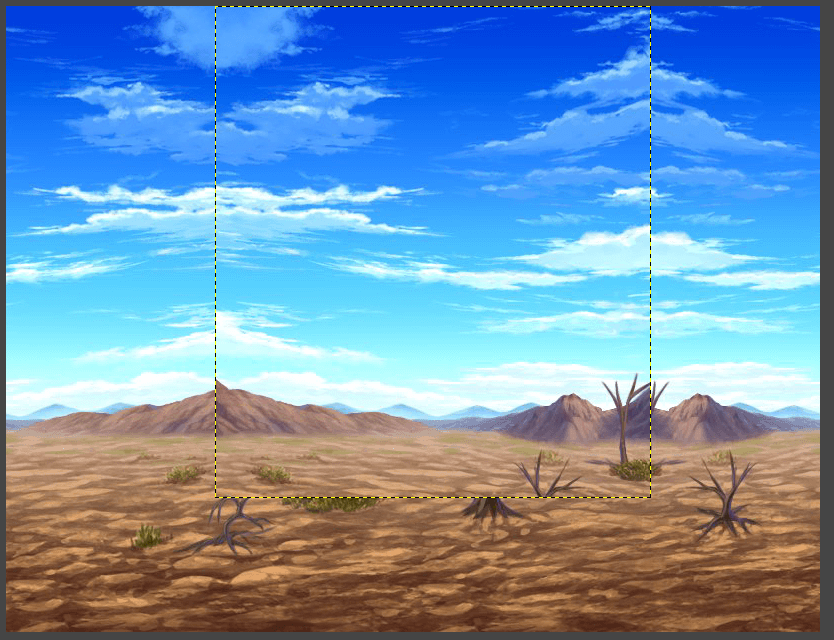
…and use a layer mask or the eraser to make everything in the center visible.The mountains should be there, as well as the tree.
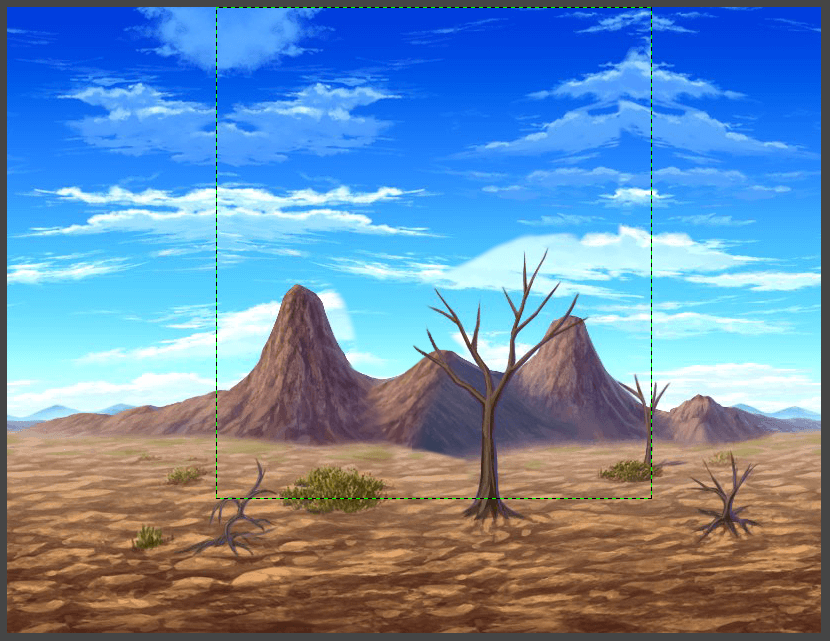
Now if it was a layer mask, we apply it and create a new one. And again, we try to erase as much of that new sky as we can to keep everything looping and looking good. For example we can erase the whole upper part, as we already had that looping before. We can also use some of the acrylic brushes when we want to blend clouds and sky into each other. And after that, well…
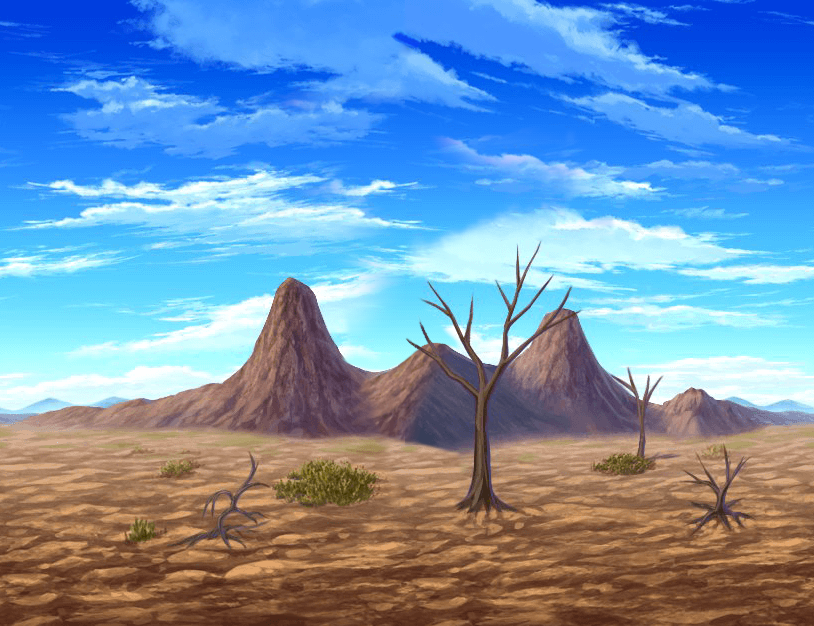
As a final test and trick to identify problematic areas we use a solar curve, therefore we open the curves option in colors and move the line about as in the screenshot:
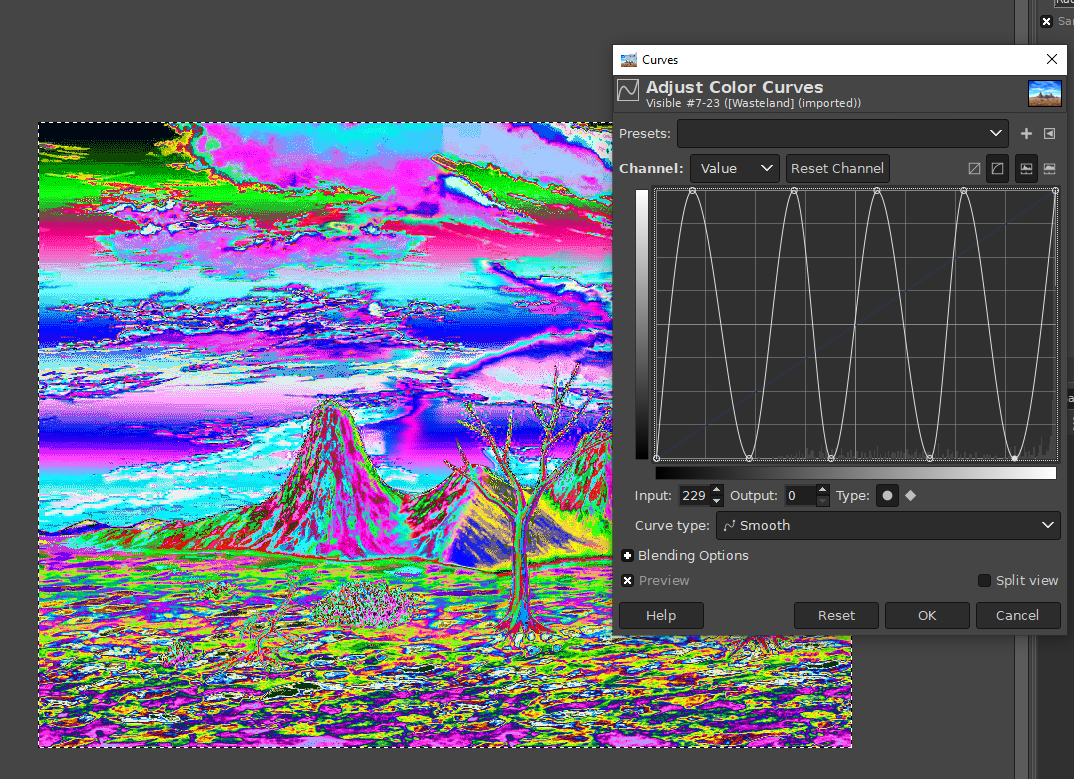
This image looks wild, but it creates high contrast for colors that are close to each other, so it makes it visible where we have not blended things into each other properly. In this example, we could fix the top middle, where we “healed” the clouds together, otherwise it looks fine.
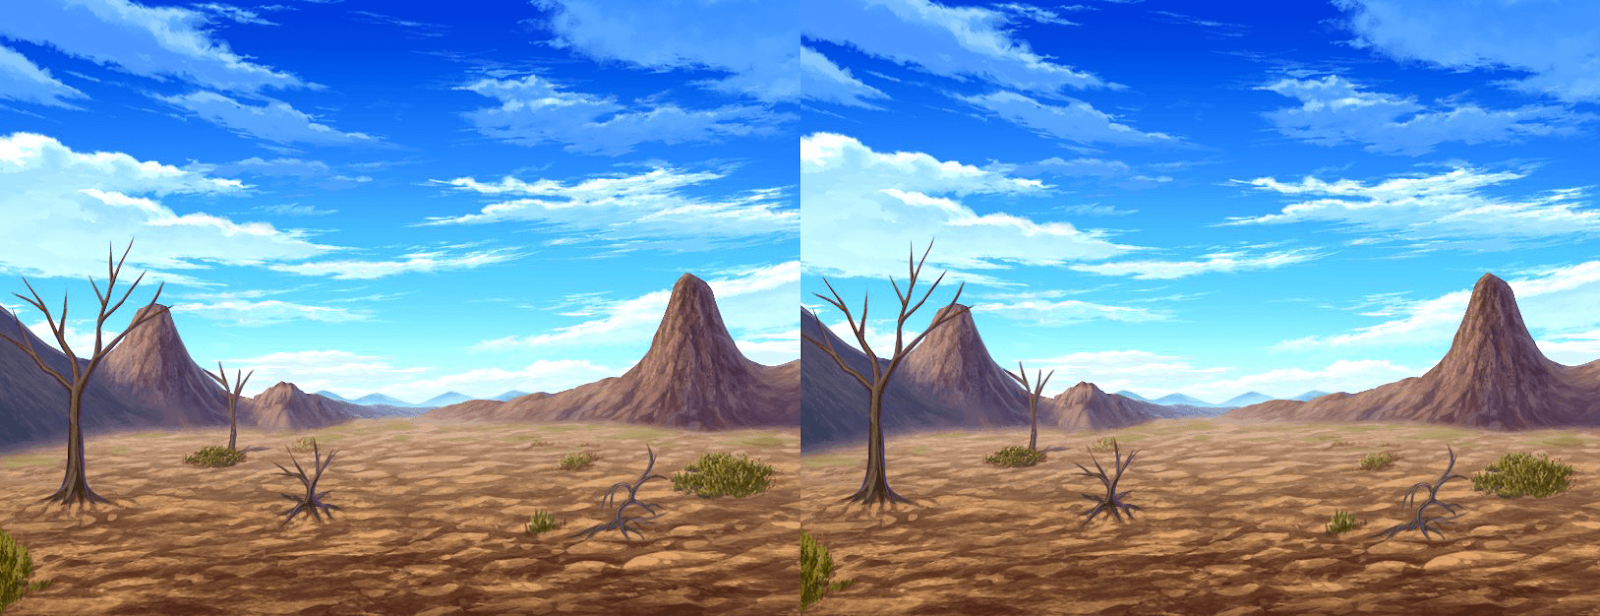
Before:
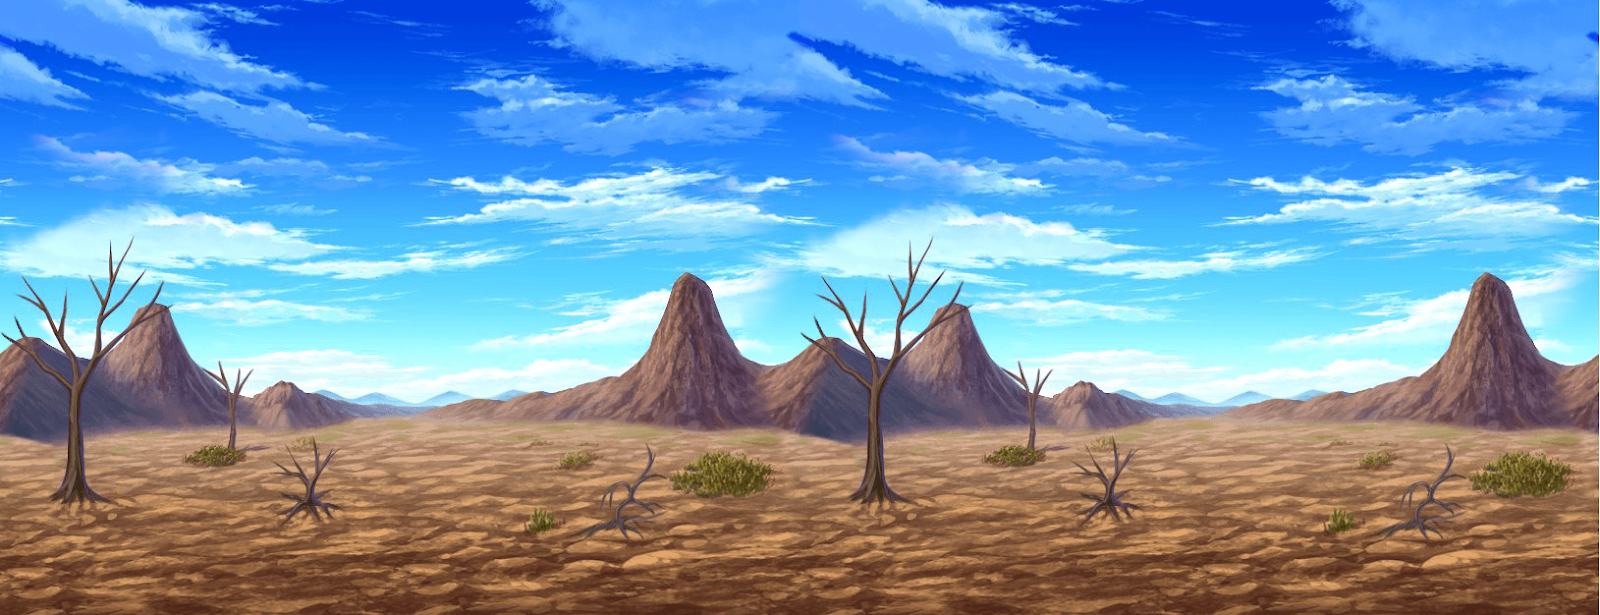
After:
本贴来自国际rpgmaker官方论坛作者:Avery处,因国际论坛即将永久关站,为了存档多年珍贵资料,署名转载到本论坛存档,由于官方帖子为英文原帖,需要中文翻译请点击论坛顶部切换语言为中文就可以将帖子翻译成中文浏览,方便大家随时查看,原文地址:
https://forums.rpgmakerweb.com/threads/making-non-looping-pictures-loop.156665/ 简体中文
简体中文
 English(英语)
 日本語(日语)
 Deutsch(德语)
 Русский язык(俄语)
 بالعربية(阿拉伯语)
 Türkçe(土耳其语)
 Português(葡萄牙语)
 ภาษาไทย(泰国语)
 한어(朝鲜语/韩语)
 Français(法语)

 聊天机器人
聊天机器人




 窥视卡
窥视卡 雷达卡
雷达卡



 发表于 2026-7-12 18:04:09
 提升卡
提升卡 置顶卡
置顶卡 沉默卡
沉默卡 喧嚣卡
喧嚣卡 变色卡
变色卡 千斤顶
千斤顶 照妖镜
照妖镜