In this tutorial, we will be writing our own menu cursor using a custom picture of your choice. By using a picture, you can design your cursor in an image editor such as Photoshop or Paint and then load it into the game.
Goal
We want to have a menu cursor such that
- It is easy to change how the cursor will look
- It will be drawn whenever we want the player to select an item from a list
- The cursor will reflect the currently highlighted selection
A complete version of the script can be found here:
https://gist.github.com/HimeWorks/8ce4e14a3bbe81db2bf3Choosing a Cursor Image
You can choose any image you want to use. I just grabbed one of the icons from the RTP iconset:

It's a bit small, but it should be good enough.
Storing Our Image
It is important to determine where you want to store your cursor image. You could simply throw it in the Graphics/Picture folder, but I would consider placing it in the Graphics/System folder. For this tutorial, I will call my cursor image "menu_cursor.png".
Creating a Cursor Sprite
In order to draw a picture on the screen, we need an object to hold it for us. I will write a separate sprite class for it.
class Sprite_Cursor < Sprite def initialize(viewport, window) super(viewport) @window = window @name = "Menu_Cursor" end def update super update_bitmap end def update_bitmap self.bitmap = Cache.system(@name) end def dispose self.bitmap.dispose super endendShould be straightforward: you have a constructor that takes a viewport and a window. The window is there so that the cursor can access some properties of the window that it is associated with. We also hardcode the name of our image. The update method will invoke whatever the sprite class needs to do, and then updates the bitmap. Because we have stored the image in Graphics/System, we can simply use the Cache.system method to get a copy of our cursor image.
Testing Our Cursor
At this point I have no idea whether this code works or not since there is nothing to test it with, so let's add it to our party menu window. Assuming you are using the default project
class Window_MenuCommand < Window_Command alias :th_menu_cursor_initialize :initialize def initialize(*args) @sprite_cursor = Sprite_Cursor.new(self) th_menu_cursor_initialize(*args) end alias :th_menu_cursor_update :update def update @sprite_cursor.update th_menu_cursor_update end alias :th_menu_cursor_dispose :dispose def dispose @sprite_cursor.dispose th_menu_cursor_dispose endendTest your game. Open the party menu and you should see your cursor at the top-left corner because we didn't specify a position for our sprite so it defaulted to (0, 0).
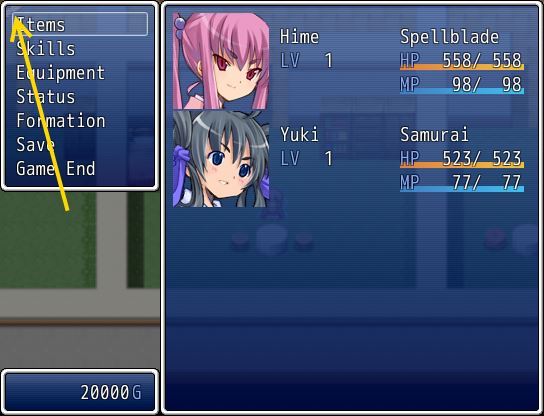 Bringing the Cursor Forward
Well, the cursor is there. But it's underneath our window. Why?
When we initialized our sprite, we didn't specify a z-value either. The window has a z-value of 100 by default, while sprites have a z-value of 0 by default. Consequently, our window will be drawn over the sprite. You can verify this by printing out the z-values of each object.
What is a good way to make sure that our cursor will always be above a window? I would consider referencing the z-value of the window directly. In the Sprite_Cursor class, modify the `update` method to create a new `update_position` method. We will use this new method for updating x, y, and z values.
def update super update_bitmap update_positionenddef update_position self.z = @window.z + 100endWe set the z-value of our sprite to one higher than its window's z-value to guarantee that it will at least be drawn above that window. This is what we get:
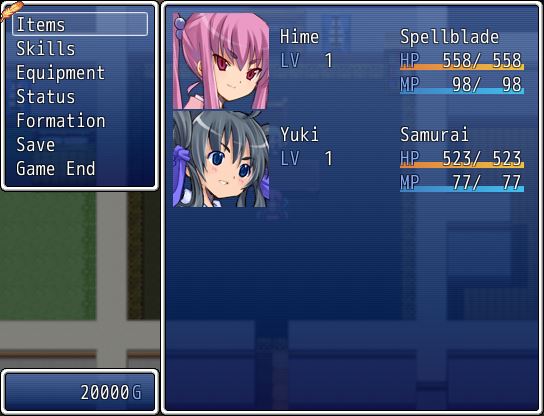
Now we can see our cursor more clearly!
Updating Cursor Position
If you were to test the cursor by moving the selection around, you will see that it does not move. Naturally, since we did not write any code instructing it to move, it will not move. How do we know where the cursor should be drawn?
The current selection is stored as a 0-based "index".
- 0 means the first item in the list is selected
- 1 means the second item in the list is selected
And so on. This is basically how ruby indexes arrays, because that is how all of the lists are stored in our Window_Selectable and its children classes.Assuming we are working with one column, our cursor simply needs to be offset by a certain amount based on the index. If the index is 0, then our cursor will be drawn at the top of the list. If our index is 1, then we need to offset our y-position by the height of a single line item.
Window_Selectable provides a standard method for doing this called `item_rect`, which takes an index and returns a rectangle that will tell you the position of the item and its width and height. Let's update our `update_position` method:
def update_position @index = @window.index rect = @window.item_rect(@index) self.x = rect.x self.y = rect.y self.z = @window.z + 100endWe can now move our selection around and our cursor will follow it!
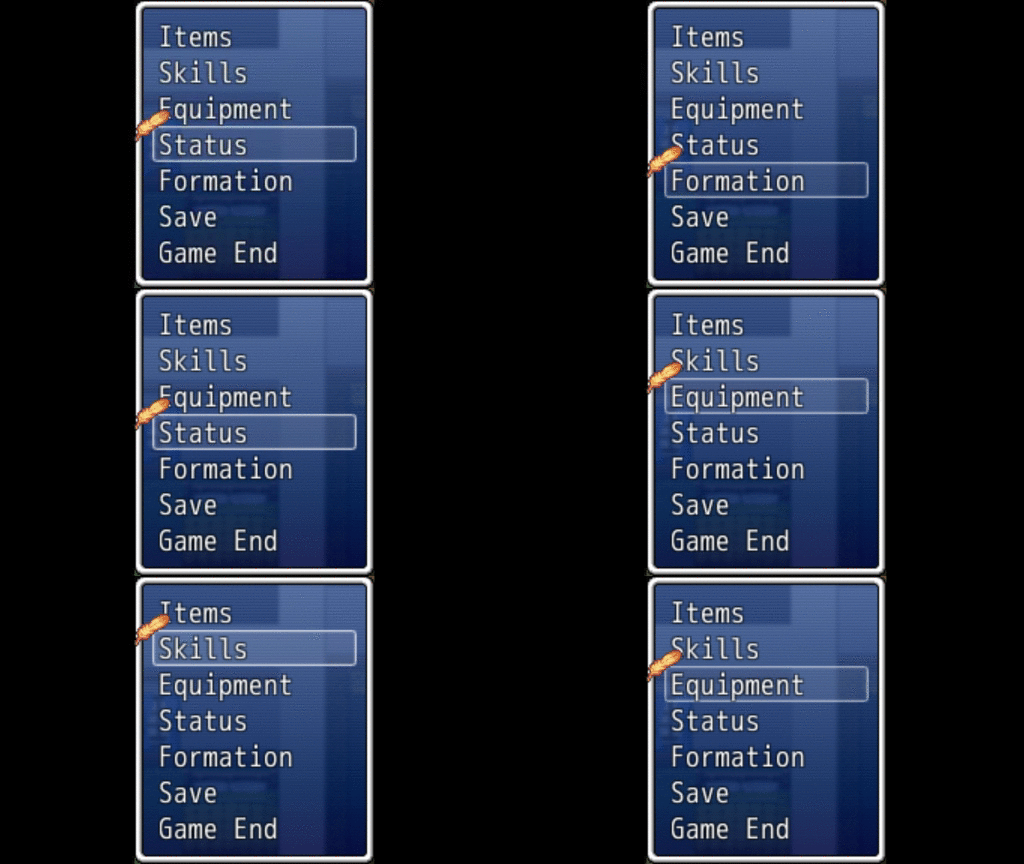
At this point, you can tweak the x and y positions to suit your needs if it does not look good to you.
Supporting Other Windows
We've used the party menu for testing purposes, and our cursor works. Problem is, it will only appear for the party menu, and specifically the main party menu command list. Let's move our code into Window_Selectable so that all of the windows that inherit it will automatically have a cursor sprite. At this point you can simply rename the class definition like this:
class Window_Selectable < Window_Base alias :th_menu_cursor_initialize :initialize def initialize(*args) @sprite_cursor = Sprite_Cursor.new(self) th_menu_cursor_initialize(*args) end alias :th_menu_cursor_update :update def update @sprite_cursor.update th_menu_cursor_update end alias :th_menu_cursor_dispose :dispose def dispose @sprite_cursor.dispose th_menu_cursor_dispose endendNow let's see what happens:
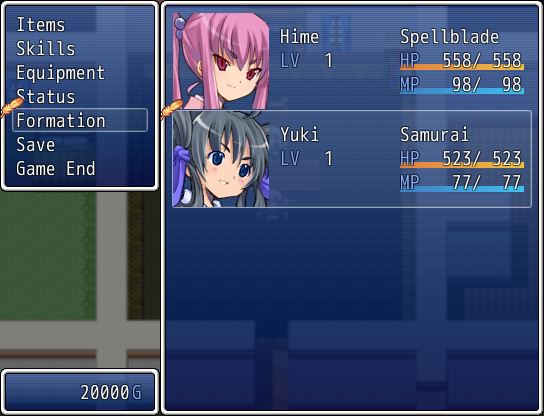
Looks pretty good. We have two cursors drawn as we expect! And all we did was change where our code was placed.
Let's look at a different scene.

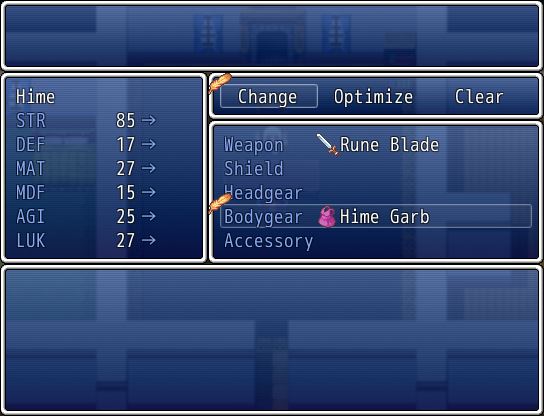
Oops. What's going on here? The rectangular cursor isn't drawn, but our custom cursor is still there. What we expect is that our cursor is only drawn when the default rectangular selection is drawn.
Remember that each selectable window has an index. However, what happens when "no item is selected"? The windows in the default project have used an index of -1 to indicate that no item is currently selected.
So we'll have to replicate this logic as well.
Updating Cursor Visibility
When the window's index is negative, our cursor should not be visible. This is not related to position, so I will define a new method called `update_visibility` in Sprite_Cursor
def update super update_visibility update_bitmap update_positionenddef update_visibility @index = @window.index if @index < 0 self.visible = false else self.visible = true endendWhich you could simplify as if you want. I probably wouldn't since writing it out seems more obvious to me what's going on, but that could be just how I interpret code.
Code:
def update_visibility @index = @window.index self.visible = @index > -1end
With some logic written for visibility, our menus will be less confusing. Sort of.
 Window Openness and Visibility
Let's look at another scene while we're at it:
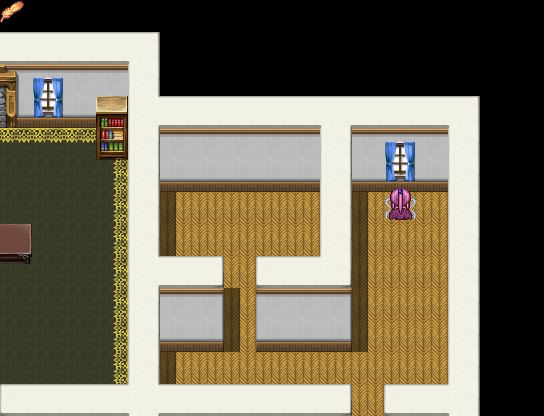
Now there's another issue. Where is that cursor coming from? Which window is it associated with?
This one might not be too obvious, so this next screenshot might help:
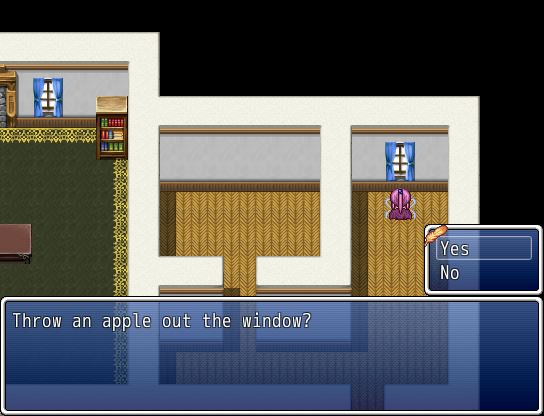
It is the choice window! When the window is "not open", it is effectively not visible. Windows have a property called "openness" which determines how "open" it is. The Window class also provides a method called "close?" that indicates whether the window is "completely closed". You can see more information about this in the help file.
For our purposes, we want the cursor to be hidden when the window is closed, so we can update our visibility method like this
def update_visibility @index = @window.index if @window.close? self.visible = false elsif @index < 0 self.visible = false else self.visible = true endendNow when a window is closed, its cursor won't be drawn either.
Window Visibility and Cursor Visibility
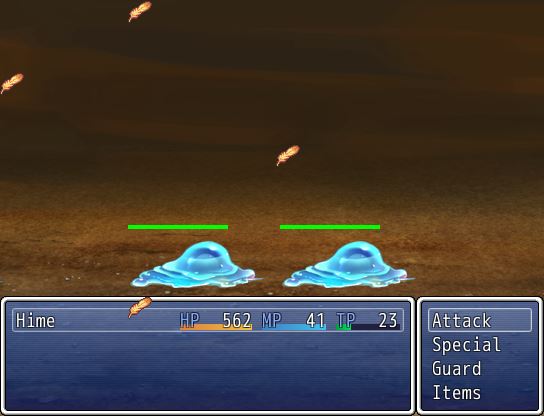
Aside from window openness, there is also another property called "visible" which basically indicates whether a window is visible or not. When a window is not visible, its cursor should not be visible either. You can see an example of this in the battle scene when you open the item window or the skill window and then close it:
With this in mind, we can proceed to update our cursor visibility method:
def update_visibility @index = @window.index if !@window.visible self.visible = false elsif @window.close? self.visible = false elsif @index < 0 self.visible = false else self.visible = true endendNow if a scene decides to simply "hide" a window when it's not needed (rather than using the "close" animation), our cursor will not linger around after the window has been hidden.
Are We Done?
It is wonderful that things are working for us automatically for some other windows without us having to do any work and ideally this is how we would like things to work, but unfortunately RPG Maker is not as ideal as we would like it to be. Take a look at the save/load scene as well as the battle scene: the cursors are either not drawn, or not drawn correctly.
This means that we would need to go through each scene and their windows to determine how the selection is implemented, as well as what information we can use for drawing our cursors.
However, the principles are generally the same: create a cursor, figure out how to update it, and then dispose of it after you are finished.
Spread the Word
If you liked the post and feel that others could benefit from it, consider tweeting it or sharing it on whichever social media channels that you use. You can also follow
@HimeWorks on Twitter or like my
Facebook page to get the latest updates or suggest topics that you would like to read about. I also create videos showcasing various RPG Maker techniques on my
Youtube channel.
(Originally posted at
HimeWorks)
本贴来自国际rpgmaker官方论坛作者:Tsukihime处,因国际论坛即将永久关站,为了存档多年珍贵资料,署名转载到本论坛存档,由于官方帖子为英文原帖,需要中文翻译请点击论坛顶部切换语言为中文就可以将帖子翻译成中文浏览,方便大家随时查看,原文地址:
https://forums.rpgmakerweb.com/threads/writing-your-own-simple-menu-cursor.38121/ 简体中文
简体中文
 English(英语)
 日本語(日语)
 Deutsch(德语)
 Русский язык(俄语)
 بالعربية(阿拉伯语)
 Türkçe(土耳其语)
 Português(葡萄牙语)
 ภาษาไทย(泰国语)
 한어(朝鲜语/韩语)
 Français(法语)

 聊天机器人
聊天机器人




 窥视卡
窥视卡 雷达卡
雷达卡



 发表于 2026-7-11 17:53:01
 提升卡
提升卡 置顶卡
置顶卡 沉默卡
沉默卡 喧嚣卡
喧嚣卡 变色卡
变色卡 千斤顶
千斤顶 照妖镜
照妖镜